August 10, 2026 · 3 min read
This MNQ trade was built around confluence rather than simply buying because price was moving higher.
The main idea was to identify where buyers could potentially step in, wait for confirmation, and then target the liquidity above.
The setup brought together several pieces of information:
SMT → Order Block → NWOG/BISI context → BSL target
Here's how I put the trade together.
I started by looking at the higher timeframe to understand the broader market structure.
The market was showing bullish intent, so instead of looking for random long entries, I wanted to find a location where I could participate in the move with defined risk.
The important part was having a clear idea of where price could potentially go next.
That led me toward the buy-side liquidity above.
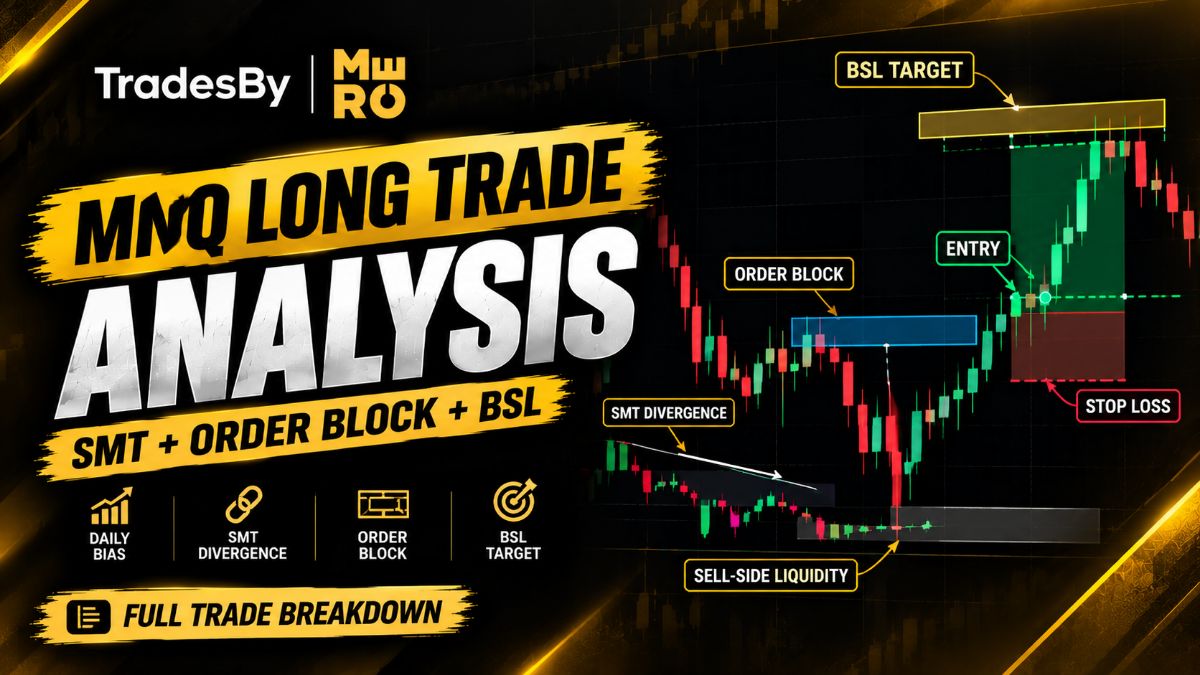
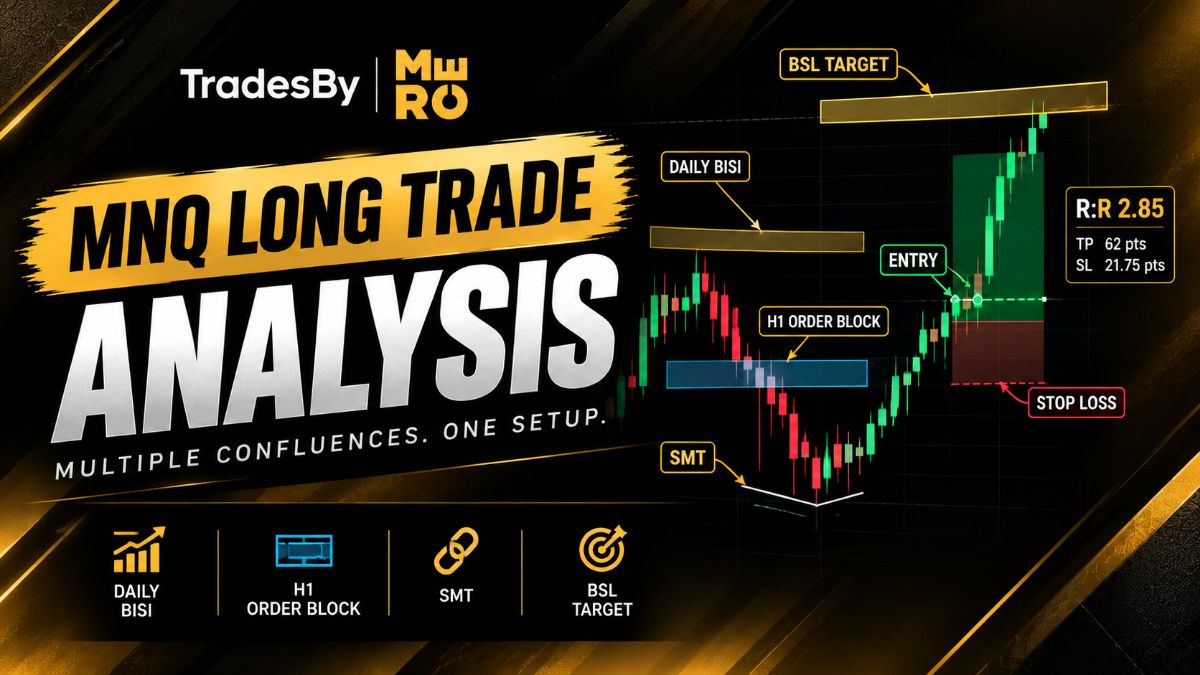
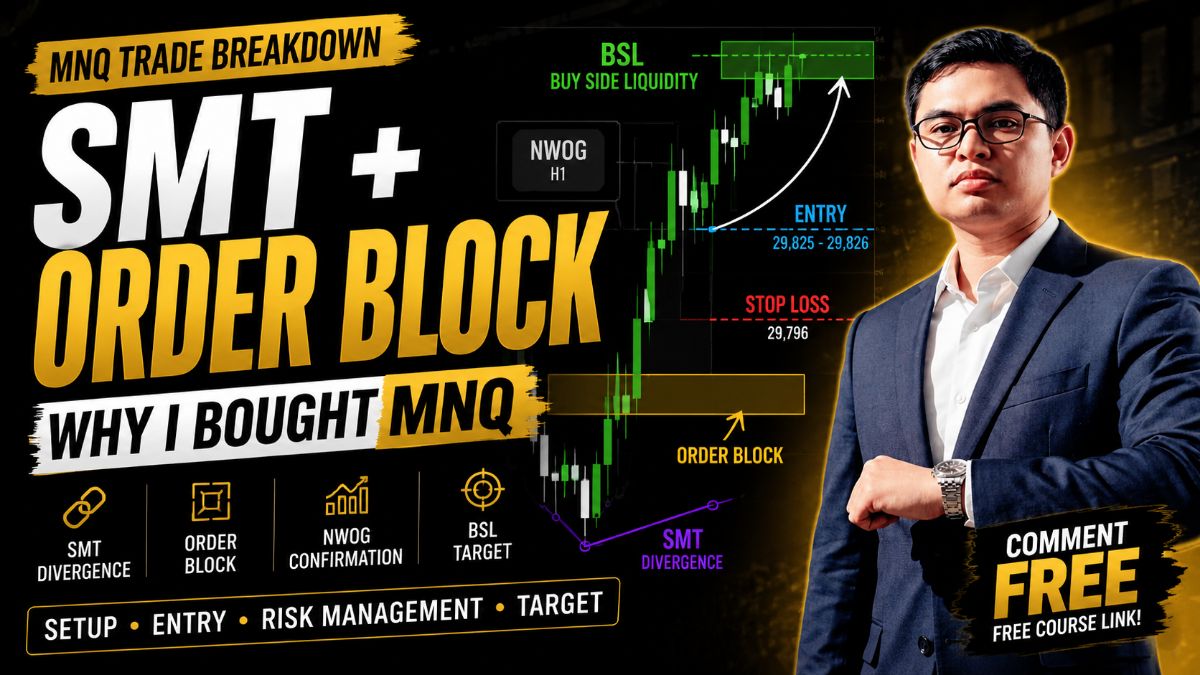
One of the key confluences was the SMT divergence visible around the lows.
The correlated markets were not confirming the same weakness, which gave me an additional reason to consider that the downside move could be losing momentum.
SMT wasn't used as an automatic entry signal.
It was confirmation that strengthened the overall bullish idea.
After identifying the SMT, I focused on the Order Block where the bullish move originated.
This gave me a defined area to work from rather than chasing price after the displacement.
The important part is that the Order Block was not considered in isolation.
It was combined with the broader market context and SMT.
The chart also shows the NWOG and BISI [H1] areas.
These provided additional context for understanding how price was moving through the higher timeframe imbalance.
The idea was to use these areas to understand where price could continue expanding rather than treating every imbalance as an automatic entry.
The long position was executed around the 29,825–29,826 area after the setup had developed.
The important part of the entry was not the exact number.
It was the location.
I was entering around the identified bullish area with a clearly defined invalidation level below it.
This is much different from buying after several bullish candles have already expanded.
The stop was placed below the structure supporting the bullish setup, around the 29,796 area.
If price had broken that area and invalidated the setup, there would no longer be a reason to remain in the position.
That is why the stop loss needs to be based on invalidation, not on how much money you are comfortable losing.
The main objective was buy-side liquidity (BSL) above the market.
Price eventually pushed higher and reached that liquidity area.
The position was therefore managed toward the predetermined objective rather than randomly closing because of fear or excitement.
The chart's risk/reward tool also shows that the trade had significantly more potential reward than the amount being risked.
The biggest lesson from this trade is confluence.
I didn't buy MNQ simply because it was bullish.
I had:
**Bullish context
SMT
Order Block
NWOG/BISI context
Defined invalidation
BSL as the target**
When several pieces of the puzzle align, the trade becomes much more structured.
The goal isn't to predict every move.
The goal is to wait for your conditions, define your risk, and execute when the setup is there.
Comment FREE on our Facebook post and we'll send you the link to our 100% free trading course.
You can also visit tradesbymerc.com for free courses, webinars, trade breakdowns, trading tools, and community access.
For educational purposes only. This is not a trading signal or a guarantee of profit. Trading involves risk.
Log in to like and join the discussion.
GOLD Long Trade Analysis | SMT + Order Block + BSL
Oct 10, 2026 · 3 min read
Stalking the Judas Swing in Aussie & Kiwi – The Bearish Path
Jun 8, 2026